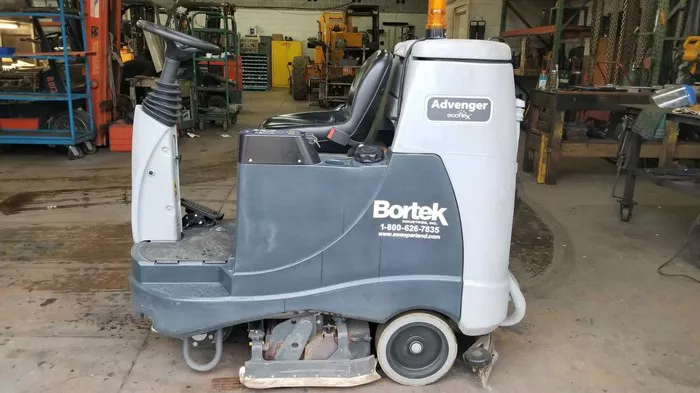
Keeping your floors clean and polished doesn’t have to be a backbreaking chore. Clarke floor scrubbers offer a powerful and efficient solution for both commercial and residential cleaning. This guide will walk you through the proper use and care of your Clarke floor scrubber, ensuring optimal performance and safety.
I. Safety Precautions
Before operating your Clarke floor scrubber, it’s crucial to prioritize safety.
1. Refer to the User Manual: Your specific Clarke model may have unique features and safety instructions. Always consult the user manual that came with your machine for detailed information before operating it for the first time.
2. General Safety Guidelines: Here are some general safety precautions to keep in mind:
Wear appropriate Personal Protective Equipment (PPE) such as gloves, safety glasses, and closed-toe shoes.
Never operate the machine around flammable materials or liquids.
Be aware of your surroundings and avoid running into people or objects.
Only operate the machine on flat, even surfaces.
See also: How to Choose the Best Electric Floor Cleaner
II. Preparing the Machine
Getting your Clarke floor scrubber ready for action involves a few simple steps:
1. Filling the Solution Tank: Locate the solution tank on your machine (usually at the front) and consult the user manual for the recommended water-to-solution ratio for your cleaning task. Fill the tank with clean water and add the appropriate cleaning solution according to the manufacturer’s instructions.
2. Selecting and Attaching the Cleaning Pad: Different floor types require different cleaning pads. Choose the pad recommended for your specific floor surface (e.g., scrubbing pad for tough dirt, polishing pad for a shine). Refer to your user manual for proper pad attachment instructions.
3. Emptying the Recovery Tank (if necessary): The recovery tank collects dirty water and cleaning solution during operation. Check the tank level indicator and empty it if it’s full before starting your cleaning task. The user manual will detail the emptying process for your specific model.
III. Operating the Floor Scrubber
Now that your machine is prepped, let’s explore how to operate it effectively:
1. Basic Controls Overview: Familiarize yourself with the control panel on your Clarke floor scrubber. This typically includes a power button, a brush/pad control switch to activate scrubbing, and a squeegee control lever to raise and lower the squeegee blade that recovers used solution.
2.Scrubbing Techniques: For optimal cleaning results, follow these techniques:
Forward and Backward Passes: Make slow, steady passes with the machine, both forward and backward, overlapping slightly each time.
Overlapping Passes: Overlapping your passes ensures complete floor coverage and prevents streaking.
3. Using Different Cleaning Modes: Many Clarke models offer different cleaning modes for specific cleaning needs:
Scrub Only: This mode activates the scrubbing action without engaging the vacuum for lighter cleaning tasks.
Scrub & Vacuum: This is the most common mode, where the machine scrubs and simultaneously vacuums up the dirty solution for a clean and dry finish.
Double Scrubbing: For heavily soiled areas, this mode lets you apply cleaning solution, scrub, then raise the squeegee to allow the solution to dwell on the floor for deeper cleaning. You can then lower the squeegee and activate the vacuum to recover the dirty solution.
4. Maneuvering Around Obstacles and Edges: Use the handle to steer your Clarke floor scrubber carefully around obstacles and edges. For tight corners, some models offer a ninety-degree cleaning path for improved maneuverability.
See also: Floor Scrubber Safety: A Guide to User Precautions
IV. Emptying and Cleaning the Machine
Once you’ve finished cleaning, it’s important to properly empty and clean your Clarke floor scrubber:
1. Draining the Recovery Tank: Locate the drain hose on your recovery tank and follow the user manual instructions for draining the dirty water and cleaning solution. Dispose of the wastewater responsibly, following local regulations.
2. Cleaning the Solution Tank and Squeegee Blade: Empty the remaining solution from the solution tank and rinse it thoroughly with clean water. Clean the squeegee blade with a damp cloth to remove any dirt or debris that might affect its performance.
3. Proper Disposal of Dirty Water and Cleaning Solution: Always dispose of dirty water and cleaning solution according to the manufacturer’s instructions and local regulations.
4. Maintaining the Brushes/Pads: Clean your scrubbing and polishing pads regularly according to the manufacturer’s recommendations. Replace worn-out pads to ensure optimal cleaning performance.

