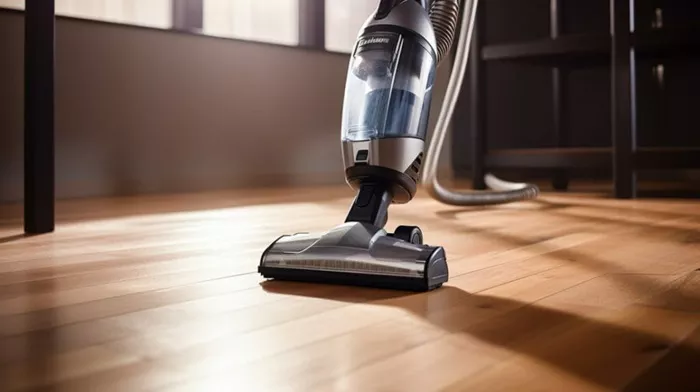
Dyson Animal Ball vacuums are renowned for their powerful suction and ability to handle tough messes, especially in homes with pets. However, like all appliances, these vacuums need regular maintenance to keep them performing at their best. Cleaning your Dyson Animal Ball vacuum ensures that it continues to work efficiently and prolongs its lifespan. This article provides a step-by-step guide to help you clean your vacuum thoroughly.
Why Regular Maintenance Is Important
Ensures Optimal Performance
Over time, dust, hair, and debris can accumulate in the vacuum, reducing its suction power. Regular cleaning prevents blockages and ensures your Dyson operates at peak performance.
Prolongs the Vacuum’s Lifespan
Proper maintenance reduces wear and tear on the vacuum’s components. This extends its usability, saving you from costly repairs or replacements.
Improves Air Quality
A clean vacuum captures dust and allergens effectively. Neglecting maintenance can lead to the release of particles back into the air, diminishing indoor air quality.
Preparing to Clean Your Dyson Animal Ball Vacuum
Gather Necessary Supplies
Before you begin, ensure you have the tools you need. A soft cloth, mild soap, warm water, and a small brush (such as a toothbrush) are sufficient for most cleaning tasks.
Unplug the Vacuum
Safety is paramount. Always unplug your Dyson Animal Ball vacuum before cleaning to prevent accidental operation and electrical hazards.
Cleaning the Dustbin and Cyclone
Removing the Dustbin
The dustbin is the first component that needs attention. Locate the release button near the handle and detach the bin from the vacuum.
Emptying the Contents
Overfilled bins can affect suction. Open the bottom of the bin over a trash can and empty the contents thoroughly. Shake gently to dislodge any stuck debris.
Washing the Dustbin
Rinse the dustbin with warm water to remove fine dust particles. Avoid using detergents or submerging the bin in water. Let it air-dry completely before reassembling.
Cleaning the Cyclone
For deeper cleaning, gently tap the cyclone unit to loosen trapped dirt. Use a dry brush to clean between the cyclone holes. Do not wash the cyclone unit, as water can damage its mechanism.
Cleaning the Filters
Locating the Filters
Dyson Animal Ball vacuums typically have two filters: a pre-motor filter and a post-motor filter. Refer to your user manual to locate them on your specific model.
Washing the Pre-Motor Filter
Remove the pre-motor filter and rinse it under cold water. Squeeze gently to remove dirt but avoid twisting or wringing, as this can damage the filter. Repeat until the water runs clear.
Cleaning the Post-Motor Filter
The post-motor filter should also be rinsed thoroughly under cold water. This filter traps finer particles, so it may take longer to clean. Allow both filters to air-dry for at least 24 hours before reinserting them.
Clearing Blockages from the Hose
Detaching the Hose
Hoses can become clogged with hair, debris, or larger particles. Detach the hose by pressing the release clips at either end.
Inspecting for Blockages
Look through the hose for visible obstructions. Gently push a flexible brush or long object through the hose to dislodge any blockages.
Washing the Hose
Rinse the hose with warm water to clear any remaining residue. Allow it to dry completely before reconnecting it to the vacuum.
Cleaning the Brush Bar
Removing the Brush Bar
Lay the vacuum on its side to access the brush bar. Use a coin or screwdriver to unlock the end caps and remove the bar.
Removing Hair and Debris
Hair and threads can wrap tightly around the brush bar. Use scissors to carefully cut through tangled material, ensuring you don’t damage the bristles.
Washing the Brush Bar
If the bar is particularly dirty, rinse it under warm water and scrub gently with a small brush. Let it dry fully before reattaching it.
Wiping Down the Exterior
Cleaning the Vacuum Body
The exterior of the vacuum can accumulate dust and fingerprints. Wipe it down with a damp cloth to maintain its appearance.
Checking Wheels and Ball Mechanism
Inspect the wheels and ball mechanism for trapped debris. Clean these areas with a damp cloth or small brush to ensure smooth maneuverability.
Reassembling the Vacuum
Ensuring Components Are Dry
Before reassembling, ensure all parts are completely dry. Moisture can damage internal components and lead to mold growth.
Reattaching Parts
Reattach the filters, hose, brush bar, and dustbin securely. Double-check all connections to ensure the vacuum is ready for use.
Troubleshooting Common Issues
Loss of Suction
If your vacuum still lacks suction after cleaning, inspect the hose and filters again. Persistent issues may require professional servicing.
Unusual Noises
Strange noises often indicate blockages or loose components. Ensure the brush bar and hose are clear, and check that all parts are securely fitted.
Overheating
Overheating can occur if the filters are clogged or if the vacuum is used for extended periods without cleaning. Allow the vacuum to cool down and clean the filters thoroughly.
Maintenance Tips for Long-Term Use
Empty the Dustbin Regularly
Avoid letting the dustbin fill beyond the max line. Emptying it after each use prevents blockages and maintains suction power.
Clean Filters Monthly
Regular filter cleaning ensures your vacuum captures dust effectively. Set a monthly reminder to wash the filters.
Inspect for Wear and Tear
Periodically inspect the brush bar, hose, and filters for signs of damage. Replacing worn parts promptly ensures optimal performance.
Conclusion
Cleaning your Dyson Animal Ball vacuum is a straightforward process that ensures its longevity and efficiency. By maintaining the dustbin, filters, hose, and brush bar, you can keep your vacuum running smoothly and your home clean. Regular care not only improves performance but also saves you from costly repairs down the line. With these simple steps, your Dyson Animal Ball vacuum will continue to be a reliable cleaning companion for years to come.
Related topics:
How to Choose the Right Wattage Vacuum Cleaner: A Detailed Guide

